


- Australia’s number one draught sealing system for sash windows that will effectively reduce rattles, draughts and noise, significantly increasing the efficiency of your windows without having to replace them. Australian made.
- Take all the guess work out of how much beading you require
- Everything you need to DIY Draught Seal 1 x double hung sash window
- Suitable for all timber painted windows that are maximum 2 metres high by 1 metre wide
- Option to include hardware kit containing 2 x Sash Lifts and 1 x Fitch Fastener
- Flat rate $30 shipping or free pick up from our warehouse in Sydney (please call to arrange pick up)
Kit contains:
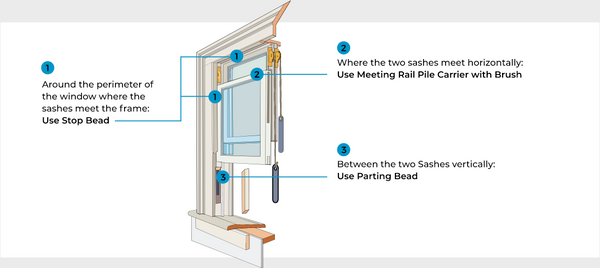
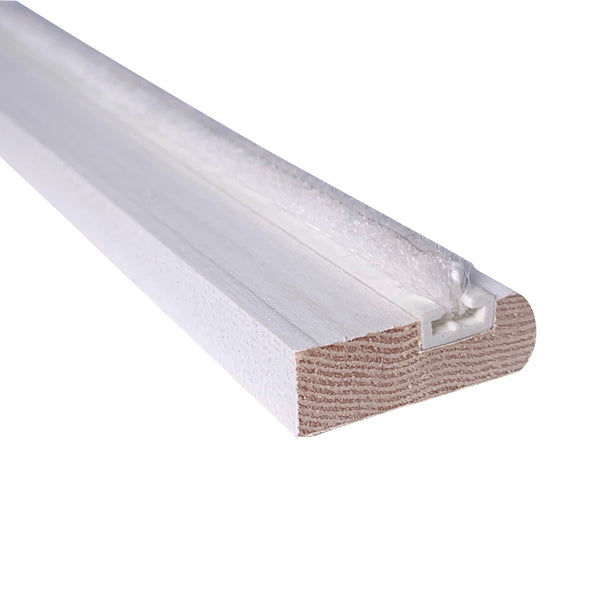
3 x 2m FSC Certified Timber Stop / Staff Bead (200mm x 22mm)
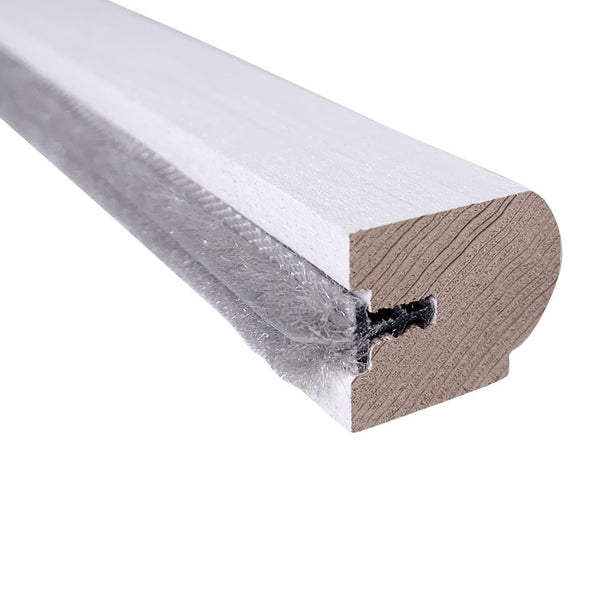
2 x 2m FSC Certified Timber Parting Bead (25mm x 8mm)
1 x 1m FSC Certified Timber Parting bead (25mm x 8mm)
1 x Meeting Rail Draught Stopper
1 x 10m Sash Cord (8mm Donaghys sash cord suitable for use with these pulleys)
Comes with detailed instructions and after sales telephone support. Watch our installation video here
Step by Step Instructions:
2. Once the Stop Beads have been removed you can then start to remove the bottom sash.
3. Remove the existing parting beads. Use your knife around as much as the parting bead as possible to loosen any paint, then use the chisel or flat pry bar to lever the bead out of groove of the frame. Do this all the way around the frame making sure you remove the parting bead at the top of the sash also.
4. Now it’s time to measure up. TOP TIP! Measure twice, cut once.
Start with the top parting bead. Measure horizontally between the frame and add a few mm to this as you want the bead to go all the way across the head of the window.
It is recommended to pre-drill your holes in the beads before nailing. Then fix the parting bead in position and nail in (40mm nails recommended).
5. Next, measure up for the side parting beads. Measure from the sill up to the parting bead you have just installed in step 4 above.
6. Cut your pieces for the left and right side then cut each in half at the halfway point. Make a pencil mark at the halfway point and cut. Top tip! Apply a small amount of superglue to the top and the bottom between the plastic and the brush of each parting bead to stop the pile moving.
7. Pre dill holes in the parting bead and nail into place.
8. On the bottom half of the window install the parting bead so that the pile faces inwards. On the top half of the window switch the bead over so that the pile faces outwards. This will cushion the sashes and eliminate the gaps.
9. Reinstall the bottom sash.
10. Now measure up for your stop / staff beads. Install the beads. Push them to the bottom sash so that they close the gap but are not too tight, You want the gap filled but still be able to move the window up and down. As previously done with your parting beads, pre-drill your holes and nail into place.
